Helping you to satisfy your taste for crafts on a budget.
"Whatever your hand finds to do, do it with all your might," Ecclesiastes 9:10
Powered by Blogger.
Showing posts with label wreath. Show all posts

Monday, July 8, 2013

Fourth of July Housewarming Gift

We just got back from vacation where we stayed with our cousins in their new home. They graciously let us stay with them for 3 nights and kept us entertained with food, fireworks, and plenty of time out on the lake! And since my patriotic wreath last month turned out nice {click HERE to see it}, I decided to make my cousin a wreath for her front door, as a thank you. I made it exactly like I did mine. I wrapped a styrofoam wreath form ( more expensive but I couldn't find a big enough straw one at Walmart or Michaels) with strips of burlap fabric that I cut. I really need to try the pool noodle idea but since this is a gift, ya know...she might take it apart one day and see an old faded beat up remnant of a pool noodle and know how cheap I really am, so I decided to splurge on a nice new sturdy smooth styrofoam one. I also found some wired stars at Dollar Tree (sorry I don't have a closeup pic of it).


After wrapping the burlap, I made a bunch of shabby flowers. I bought a quarter yard of red white and blue fabric at walmart and cut it into strips to roll the flowers. I also used scrap red white and blue fabric and even some scrap burlap for some solid colors.


I used straight pins to secure the flowers to the wreath so that she can remove them if she wants to change them out.


For the letter G, I spray painted a plain wooden letter with red. I just fit it in between the wire stars and the wreath and it held in place pretty well.


Since I really liked the addition of the new fabric and the stars, I added them to my own wreath and I think they really make a nice difference! 

                           Before:

                             After:


This wreath form was larger than mine and the letter G that I had originally bought (seen in the first picture above) just didn't look right in the center and it just seemed too small, so I bought a bigger one and wired it to the side of the wreath. So when you are shopping for accessories for your wreath, be sure to think about the size of them in relation to the overall size of the wreath. If they are too small, they will not stand out as nicely.


                                   Before:
                              After:
 
 
Do you see the difference?
I like the font a little better too. It is a little "curlier" rather than "block" style.
I found it at Hobby Lobby.
Here it is closeup:


Word to the wise: If your front door gets a lot of sun, be careful using wreaths with lots of hot glue because it WILL melt and the wreath will fall apart. This is true even in winter, if it gets direct sunlight. Luckily, I have a north facing door that never gets direct sunlight, so I have never had this problem. But I have heard from others that this is possible.

The estimated cost for this gift was: $13
$7 styrofoam wreath form (used a 40% coupon off a $12 one)
$1 burlap
$1 red white blue fabric (you could use fabric scraps)
$1 wired stars
$3 letter G

Thursday, June 6, 2013

Patriotic wreath

Summertime calls for a patriotic wreath.
I have not yet made myself a red, white, and blue wreath so I made sure to make myself one this summer.


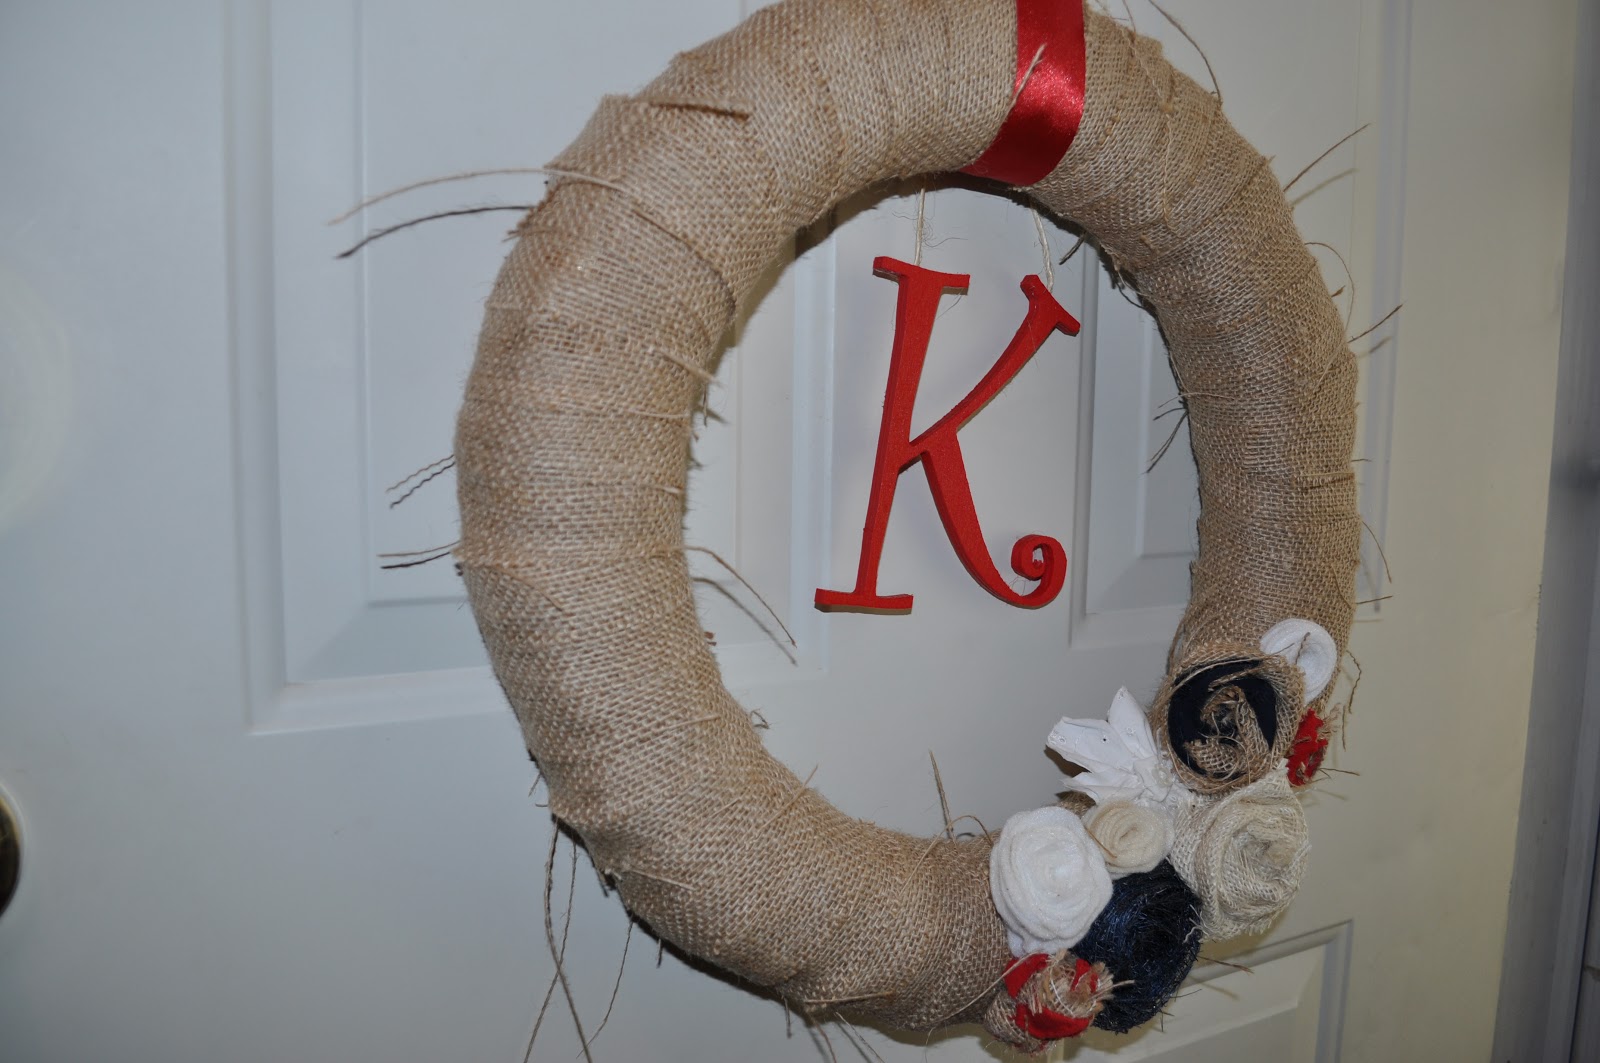
First I bought a 16 inch straw wreath form for $5. then I grabbed a piece of burlap about a yard or so in the Walmart fabric scrap bin on the side of the cutting table. It was only $2! All of the shabby flowers I made out of my fabric scraps. The letter K I bought for $1 and spray painted it red. So here you have an $8 project!

I cut the burlap into strips, then wrapped the wreath form with the strips, hot gluing as I made my way around. Then I used hot glue to make the shabby flowers. I want to be able to change out the flowers for different seasons, so instead of hot gluing them to the wreath, I used straight pins that can be removed without damaging the flowers or the burlap. Then next summer I can pin them right back on!

I used twine to hang the letter in the middle, then a bright red ribbon to hang the wreath.

I could trim the burlap strings, but I want to keep the shabby look so I decided to leave it alone.

A little late for Memorial Day, but in plenty of time for 4th of July!


Thursday, September 20, 2012

DIY Halloween wreath


I LOVE fall!


It has always been my favorite season. I usually decorate with lots of pumpkins, but I only have a few "Halloweeny" decor items. This year, my front door was going to get a splash of Halloween on it, and I am really into making wreaths, so I made a Halloween wreath. I chose to avoid the creepy, scary theme and just used lots of orange and black colors.


My starting materials


I started with an old 8" grapevine wreath from my mother-in-law's shed, and spray painted it black. 8" is a small wreath, so to make it appear fuller, I cut and tied strips of black tulle around it, tutu style! The strips were about 3"x 12" each. I also tied on some ribbon! VaVaVoom! Instant volume!


Then I added the final touches...orange felt flowers, and some fun "EEK" letters.


Don't you just love the little bat hanging out on them? He's an eraser left over from last year's Halloween goodies.

Hope you like it!


Here it is on our front door, ready to welcome Trick-or-Treaters...


My cost for this project:

Tulle $3
Orange Felt { I only needed 1 piece for all 5 flowers}. 20cents.

I already had the wreath form, paint, ribbon, and even the EEK letters on hand. I bought the letters last year but never used them. You can find them at Michaels for mere pennies though!

Happy Halloween!


Linking up to...


So You Think You're Crafty
It's Overflowing