Helping you to satisfy your taste for crafts on a budget.
"Whatever your hand finds to do, do it with all your might," Ecclesiastes 9:10
Powered by Blogger.

Friday, June 28, 2013

Kids Craft - Dreamcatchers


I post all the time about crafts that I enjoy. And a lot of them are done with my kids next to me doing something similar with more "kid-like" materials. This week my kids did a project entirely on their own, without any help from me.

Like any kid, they occasionally have bad dreams, my oldest especially. We have a lot of mornings tripping over  kids on the floor in our room because they find their way into our room during the night. We have also had several nighttime storms lately. Thunder at bedtime is not something you want to go to sleep to.

So in an effort to help them feel more comfortable in their room, and encourage their creativity, I suggested that they make their own Dreamcatchers!

Since this is a kid project, it is very cheap and made with very common items.

We started with paper plates, yarn, lots of stickers, and tape. Because my kids LOVE tape!!!


First, cut a hole out for the center. Then string pieces of yarn from side to side to create a web in the center. Then decorate the outer circle with anything you want. Also, you can hang yarn from the bottom and add random things from around the house that you like, ours are very random!


Here are the finished products:


Since they share a room, they chose to hang it on their bunk bed.


Goodnight.....sleep tight.....don't let the bed bugs bite! (That's what we say every night at bedtime!).


Linking up at...


Thursday, June 6, 2013

Patriotic wreath

Summertime calls for a patriotic wreath.
I have not yet made myself a red, white, and blue wreath so I made sure to make myself one this summer.


First I bought a 16 inch straw wreath form for $5. then I grabbed a piece of burlap about a yard or so in the Walmart fabric scrap bin on the side of the cutting table. It was only $2! All of the shabby flowers I made out of my fabric scraps. The letter K I bought for $1 and spray painted it red. So here you have an $8 project!

I cut the burlap into strips, then wrapped the wreath form with the strips, hot gluing as I made my way around. Then I used hot glue to make the shabby flowers. I want to be able to change out the flowers for different seasons, so instead of hot gluing them to the wreath, I used straight pins that can be removed without damaging the flowers or the burlap. Then next summer I can pin them right back on!

I used twine to hang the letter in the middle, then a bright red ribbon to hang the wreath.

I could trim the burlap strings, but I want to keep the shabby look so I decided to leave it alone.

A little late for Memorial Day, but in plenty of time for 4th of July!


Shirt sleeve scrunchies

After 3 years of t-ball and machine pitch, Emma is now in the minor leagues! Go Freer Flyers!
The softball season will be over by the end of June, but there are still some pretty hot summer days during June, which makes for some pretty sweaty ballgames, which last 2 hours now.

So to keep the girls cool during the games, I made shirt sleeve scrunchies in their team color (lime green).


Let me tell you how awesomely cool this ribbon is...I can't think of anything cuter for a girls softball team!
Softball themed words including swing, run, catch, throw, and then a ball cap with lips and a ponytail with "Like a Girl" font. :)


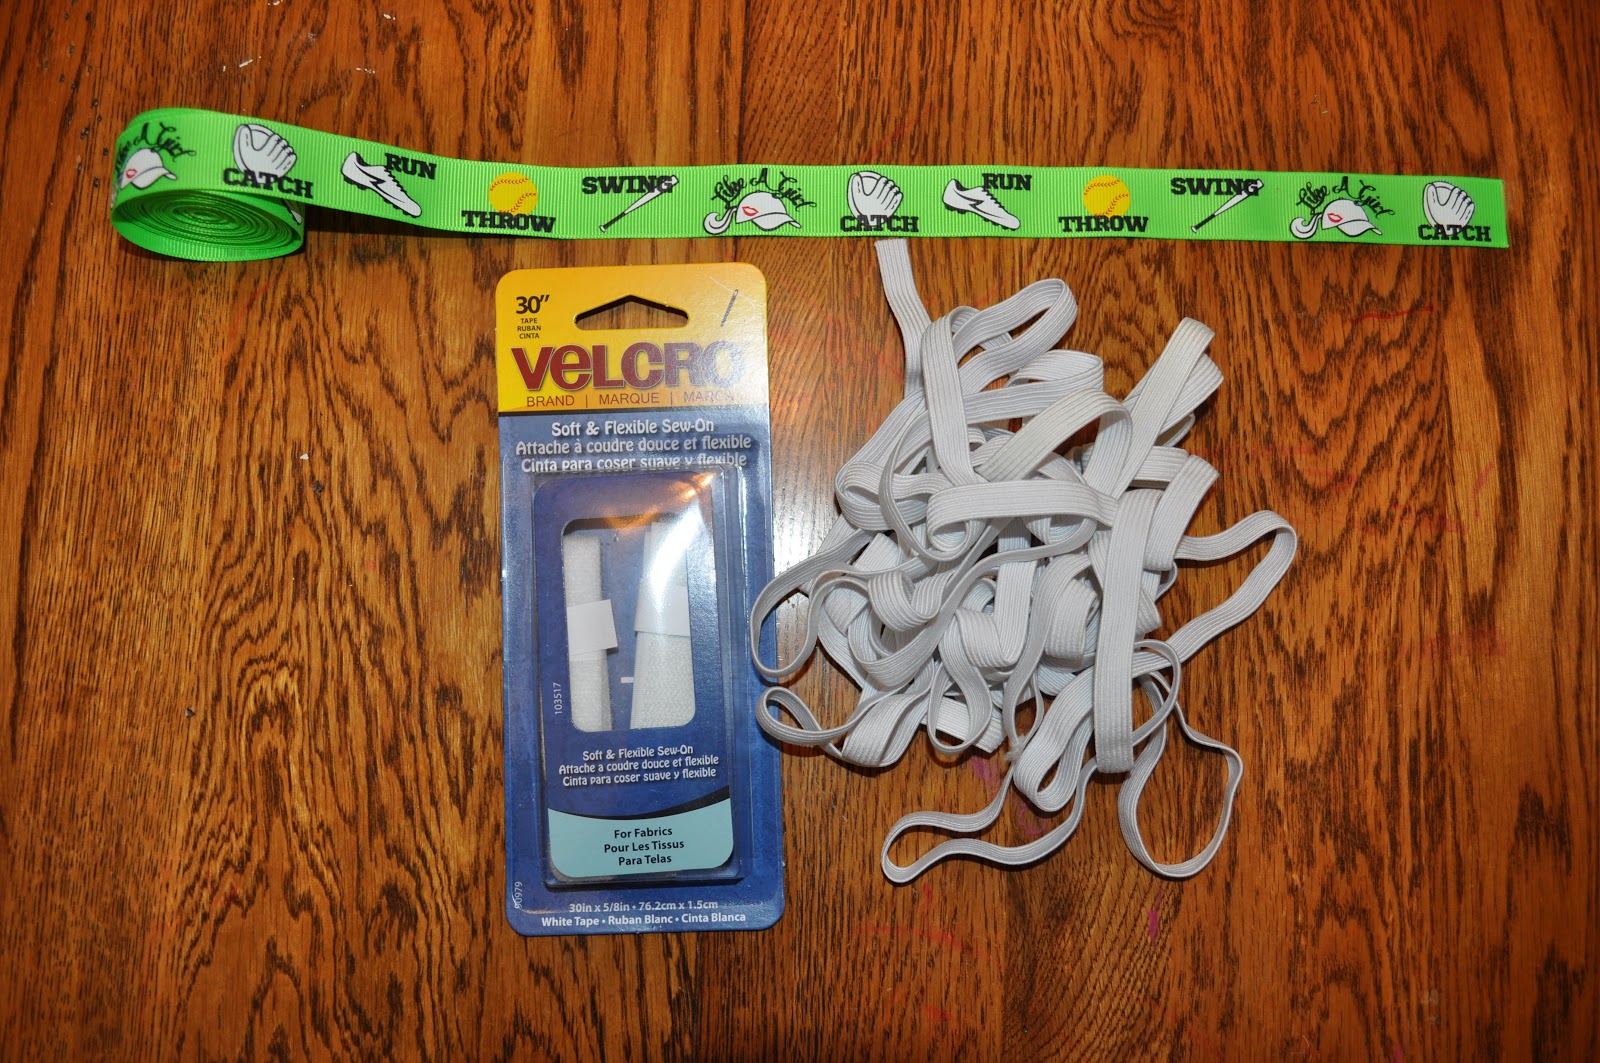
You can make these with fabric, but the tutorials I saw involved sewing which is not my forte. So I looked everywhere for softball themed ribbon but the craft stores only had baseball, or the basic white ribbon with softballs on it...boriiinnnggg. So I ended up finding some really cute ribbon on Etsy! My custom order for 5 yards of ribbon came in less than a week, and cost me about $8 including shipping. The rest of the supplies I bought at Walmart. I used 3/8" elastic and 5/8" Velcro.


Other supplies needed are a lighter (for ribbon de-fraying), ruler, and scissors.


I found a pretty good video on you tube (click HERE to watch it) that I watched over and over ...and over again. Once I made a couple scrunchies I was on a roll!


This is how much I needed of each supply for a team of 18 girls:

Ribbon...not sure how many yards I used because I cut according to the design, not by length. ( see next paragraph) but you need about 3 inches for each sleeve, or 6 inches for each girl.

Velcro...same amount as ribbon.

Elastic...3.5 inches for each sleeve

 
I hot glued everything together, according to the video.


The tricky part was that with the ribbon I chose, the 2" Velcro pieces were too long. So I had to figure out the best length of ribbon, then cut the Velcro to fit. And since the different pictures on the
ribbon were slightly different in size, some of the Velcro pieces had to be trimmed accordingly. I used a lighter to singe the ribbon ends to prevent fraying.

After final trimming and leftover glue-string removal, they looked pretty cute!


{Ignore the koolaid mustache!:)}

We brought them to practice and the girls couldn't wait to try them out!

Here's to a great season girls!!