I have desperately been wanting some new window treatments in our living room for quite awhile. Naturally, this is the room we spend most of our time in and it looks out over the backyard/pool, so it gets a lot of attention in the warmer months. But window treatments are so expensive and my budget was next to nothing. I was determined to find something better than the old sheer window scarves I had draped over the rod for the past few years. And I do love a good challenge. I was on a mission...operation update living room window on a cheap budget!
For the look I wanted, new curtains were going to cost me around $50-100. That was certainly out of my budget, so I decided that my goal cost would be around $20. I shopped every store in my area...Target, Kmart, Walmart, Penneys, Kohls. I found a lot of panels in clearance sections for ~$10. But just couldn't find 2 of anything that I loved. I wasnt going to spend my energy on a $20 update if I didn't love it. So I kept my eyes open at the stores and my mind open online. Somehow I came across the idea for DIY burlap curtains. I did some searching and found a great project at Life to the T.
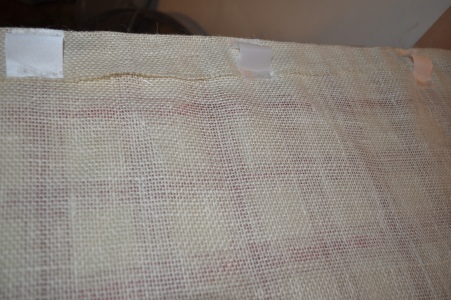
Burlap comes in many colors so you can lighten up your windows as much or as little as you want. I was going for a light, airy, summery feel so I chose oyster for my shade. I bought 6 yards and had them cut it in half, so I had 2 sets of 3 yards each. I followed Trish's {Life to the T} no-sew tutorial for "hemming" the edges, using stitch witchery and an iron, and it worked perfectly. I do love the look of her clip rings at the tops but I didn't have any on hand and in an effort to be resourceful, I decided to hot glue pieces of ribbon to the back of the curtains to hang them onto the rod.
[caption id="attachment_463" align="alignleft" width="229" caption="This, my friends, is 6 yards of burlap!"]
 [/caption]
[caption id="" align="alignnone" width="300" caption="A roll of stitch witchery and an iron is all you need!"]
 [/caption]
[caption id="attachment_442" align="alignright" width="300" caption="Ribbon on back will allow the curtains to hang on the rod"]
 [/caption]
*Note: I read some comments about burlap having a slight smell to it and having to air it outside. I bought mine at Joann's and did not have any problem with odor.
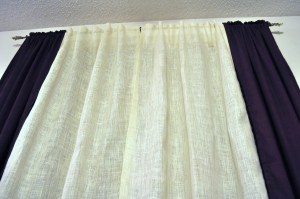
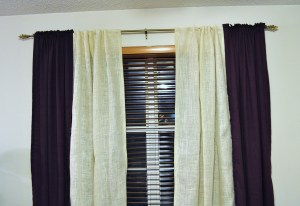
I loved the look of the new curtains, but it just wasn't enough. I decided I really wanted a layered look. I struck gold at Kmart where I happened to find these awesome eggplant panels on clearance for only $4.90! So I put them on the outside of the burlaps and voila!!
New window treatments and an updated view for under $30!
And even better, I bought 6 yards of burlap and have enough leftover for my next project!


No comments:
Post a Comment